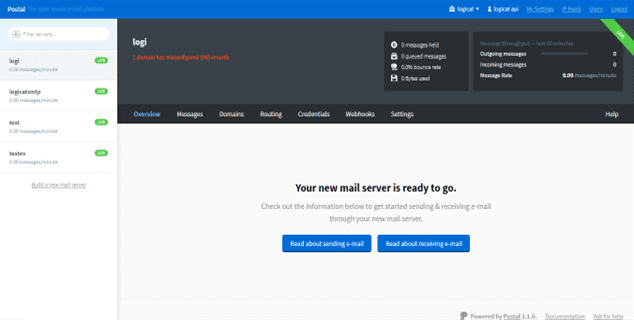
Attention Cold Emailers! If you need help with inboxing and deliverability, domains and mailboxes setup, list cleaning, cold email strategies, copywriting, or creating captivating campaigns that move people and bring you more business, check out our Cold Email Services page. We provide top-notch cold email services, including high-delivery systems (better than Acellemail), CRM integration, cold and warm drips, lead generation, appointment setting, and much more!
Before you start installing Acelle Mail, make sure you:
A. Download Acelle Mail
Download HERE
B. Get hosting for Acelle:
Have a Cloud Virtual Private Server (VPS) and get $200 in credit over 60 days with Digital Ocean by clicking here!
C. Get a sending server:
You have to options of sending server-
Option 1. Use your own sending VPS:
In this case make sure to purchase at least two VPSs, one for Acelle and one for sending.
Pros: unlimited and free. You can literally send millions of emails at no cost. Cons: You will need to warm up your sending server.
Option 2: Use subscription based sending servers.
Pros: already warmed up sending servers.
Cons: cost money. Plus if you will send cold campaigns and show poor performance, they will suspend your campaigns.
For an in-depth and detailed pricing comparison of subscription- based sending servers, click here.
C. Have a hosting domain
Click HERE to get a domain
If you want the pros at Omni Online Strategies to install Acelle and postal for you, please don’t hesitate to get in touch!
Let’s get started!
“Email lists and website are the two only things you can own on the internet. Everything else is just rented.” (Tubi Lutke. Shopify Founder)
Indeed, email lists are real assets. They give you the ability to communicate with a large audience, build trust, authority and relationship. Bulk-emailing allows you to use your email lists and engage with your prospects on a large scale.
However to do all that, you need an email marketing platform.
Platforms like Activecampaign or Mailchimp can be very expensive and can limit the size of your lists and the amount of the campaigns you are allowed to send. Other email software such as Sendinblue may not limit your lists but strictly limit your ability to conduct cold-emailing.
Recently we published an article about Acelle Mail and explained why it may be the right time for you to install a self-hosted email platform. Acelle Mail is an excellent open source web-based email platform that works with postal mail server.
This article is a step by step setup guide with two parts:
1. How to install Acelle Mail.
2. SMTP Server Setup with Postal
We hope that you will enjoy this documentation and if you want our team to install Acelle Mail for you, please click on the chat below!
Before you start, download Acelle Email marketing Web Application.
Acelle is a self-hosted web application written in PHP, on top of the Laravel 7 framework.
The followings are required to install Acelle:
Operating System: Linux (RedHat, Fedora, CentOS, Debian, Ubuntu, etc.). Unfortunately we have yet to support Windows or Mac OS.
PHP Version: 5.6, 7.x
MySQL Version: >= 5.x
Application server: Apache, Nginx
Below are the PHP extensions that are required for installing Acelle Mail:
Mbstring
OpenSSL
Socket
PDO Driver
Tokenizer
PHP Zip Archive
IMAP Extension
If you can’t tell which extensions are available on your server, don’t worry. Acelle Mail will check and prompt you to install a missing extension during the installation wizard.
Download Acelle Mail here
Installation with cPanel
It is recommended that you install Acelle Mail onto one of your subdomains. Suppose your domain name is mydomain.com, then you may want to install Acelle Mail on a subdomain like app.mydomain.com
The steps are as follows
Go to cPnanel’s Subdomains menu
Add a subdomain named app
By default, cPanel will then create a webroot folder (document root) for your subdomain at /marketing.mydomain.com/
Upload Acelle Mail source files to the subdomain webroot folder. The file structure should look like this:
After you have uploaded the source files, it is important to change the subdomain’s document root to the public folder of Acelle Mail
Now you can access Acelle Mail at: http://marketing.mydomain.com. Follow the web installation wizard and you will get Acelle installed on your own host.
Note: if you are on other web hosting manager like Plesk, DirectAdmin, Kloxo… the same rules apply. The key is to set Acelle Mail’s public folder as the document root of your domain or subdomain.
Installation with Apache 2.4 (without Cpanel)
Before installing, make sure Apache mod_rewrite is enabled.
Then, unzip the source file
cd /home/user/
unzip Acelle-2.0.4.zip
Put Acelle source folder into your domain or subdomain’s document root. For example, if your Acelle source is located at /home/user/Acelle, you can configure Apache virtual host as follows, notice how DocumentRoot is setup
<VirtualHost *:80>
ServerName yourhost.net
DocumentRoot “/home/user/Acelle/public”
Options Indexes FollowSymLinks
<Directory “/home/user/Acelle/public”>
AllowOverride All
Require all granted
</Directory>
</VirtualHost>
Change the director/file’s owner to Apache’s running user, to make sure it has proper permission on your source files. If you are on Ubuntu, the default user that Apache runs under is www-data (and it is apache for CentOS/RedHat).
sudo chown www-data:www-data -R /home/user/Acelle
sudo chmod 775 -R /home/user/Acelle
Then restart Apache and go to the webapp’s installation URL. For example
http://yourhost.net/install
Follow the web installation wizard to get Acelle installed on your own host.
Configuration wizard
Once you successfully have Acelle Mail up and running, you can go through the configuration wizard to setup it on your server.
First of all, Acelle Mail will check if there is any library missing on the server and will remind you to install it.
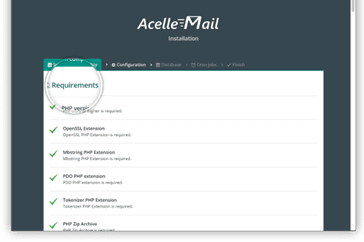
Once all the dependencies are installed, you can go to the next step to fill in the webapp information. The information can be changed later on in the Administration
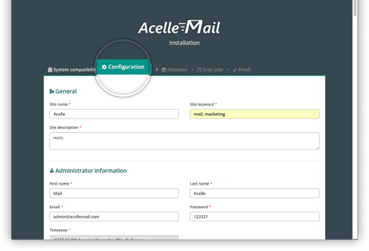
Dashboard
Acelle Mail uses a MySQL database in the background, so you need to have one available. At this step, you need to fill in the database credentials for Acelle Mail to connect to.
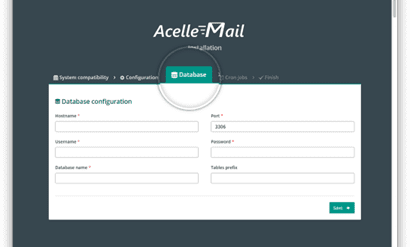
Once the database connection is established, Acelle Mail will initialize the database with the default settings as well as create the default
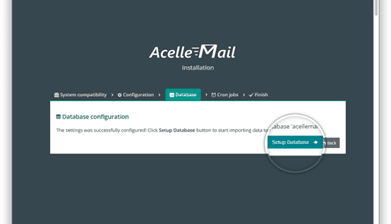
Administrator
Acelle Mail will generate the cronjob settings so that you can install to your system. Cronjobs are used to trigger the email campaigns as well as other system processes in the background. Remember that Acelle Mail source folder must be writable by the cronjob processes.
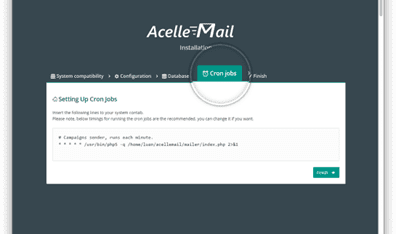
And after everything is setup. You are ready to go with Acelle Mail

Getting Started
User roles
Acelle Mail supports two different roles for user account: Administrator and User (Campaign Manager). One user account can be of either or both roles.
An Administrator is responsible for
Manage users / groups
Manage sending servers
Manage bounce/feedback handlers
Manage sending domains
Manage application-wide settings
Manage shared template libraries
Monitor application statistics
A Campaign Manager can actually work with mailing lists/campaigns:
Create/update/delete own mailing lists
Create/update/delete own campaigns
Monitor own campaigns statistics
Note: Administrator and Campaign Manager have their own view in Acelle Mail. If one user is of both roles, he can switch the view accordingly
4.2. Create your first campaign
In order to send an email campaigns, the followings are required
A sending server (an application, server or 3rd service) which actually delivers our emails
Claim $200 credit over 60 days with Digital Ocean!A mail list containing the subscribers to whom we’re are sending emails to
Create a sending server (Administrator)
The administrator must configure at least one sending server for the system. Switch to Admin View and choose Sending > Sending Servers, then choose a sending server type to create
As of version 2.0.4, the following sending server types are supported by Acelle Mail:
Standard SMTP: send email through an internal/external SMTP service.
Sendmail: send email directly through the sendmail program on the hosting server.
PHP mail() function: send email directly through the mail() function of PHP.
Amazon SES API/SMTP: send email through Amazon Simple Mail Service, using either Amazon’s web API or standard SMTP connection.
Mailgun API/SMTP: send email through Mailgun, using either Mailgun’s web API or standard SMTP connection.
SendGrid API/SMTP: send email through SendGrid, using either SendGrid’s web API (v2) or standard SMTP connection.
ElasticEmail API: send email through ElasticEmail, using its web API (v2)
more to be supported…
2. SMTP Server Setup with Postal
Claim $200 credit over 60 days with Digital Ocean!
What is the SMTP Server?
Postal is a complete and fully featured mail server that can be used by web apps, websites and web servers. When you use Activecampaign, Mailgun or Getresponse, you basically send emails using their sending IP. Postal in the other hand, is an open source mail server that you can run on your own servers.
In simple words, SMTP is what allows you to send emails over the internet.
SMTP stands for “Simple Mail Transfer Protocol” and it is the technology that is responsible for delivering emails over the internet.
What are ISPs?
The emails are delivered to mail accounts that are hosted with Internet Service Providers (ISPs) such as Gmail, Yahoo or Hotmail. Delivery is another large topic which we have discussed on previous Omni blog posts.
What is the Management Application?
This is your email marketing software. This is where you manage your lists, campaigns and automations.
Can you send unlimited emails totally free?
Simply put yes.
If you send emails with your own server, the only limit that you have is the amount of emails that your server can handle. The more resources your server has, (CPU and RAM), the more emails you can send.
Requirements to Setup SMTP Server.
In order to Build and Setup an SMTP Server, you will mainly need two things:
A Domain name
VPS Server with port 25 opened.
Claim $200 credit over 60 days with Digital Ocean!
There are a lot of DOMAIN REGISTRATION PROVIDERS where you can get a domain from like:
Domain.com
Godaddy.
Namecheap.
freenom.
Enom.
Google Domain.
And here is a list of some companies that allows port 25 by default:
Digital Ocean*
Host wind.
Contabo.
Interserver.
OVH.
AWS (some accounts are blocked)
After you select your VPS company, just create a VPS Server with the following specifications :
Postal SMTP installation.
The postal SMTP server runs using a software. In order for postal to run successfully on your server make sure you install and have that software running on your server. This software helps to run containers responsible for postal to be fully functional on your server. For instance : the installation guide on this tutorial is going to run postal using docker software. You can also use any software of your choice.
sudo curl -L “https://github.com/docker/compose/releases/download/1.29.2/docker-compose-$(uname -s)-$(uname -m)” -o /usr/local/bin/docker-compose
sudo chmod +x /usr/local/bin/docker-compose
3. sudo ln -s /usr/local/bin/docker-compose /usr/bin/docker-compose4. docker-compose –version5. sudo apt update6. sudo apt install apt-transport-https ca-certificates curl software-properties-common7. curl -fsSL https://download.docker.com/linux/ubuntu/gpg | sudo apt-key add 8. sudo add-apt-repository “deb [arch=amd64] https://download.docker.com/linux/ubuntu bionic stable”9. sudo apt update10. apt-cache policy docker-ce11. sudo apt install docker-ce12. sudo systemctl status docker13. apt install git curl jq14. git clone https://postalserver.io/start/install /opt/postal/install15. sudo ln -s /opt/postal/install/bin/postal /usr/bin/postal
docker run -d \ –name postal-mariadb \ -p 127.0.0.1:3306:3306 \ –restart always \ -e MARIADB_DATABASE=postal \ -e MARIADB_ROOT_PASSWORD=postal \ mariadb
docker run -d \ –name postal-rabbitmq \ -p 127.0.0.1:5672:5672 \ –restart always \ -e RABBITMQ_DEFAULT_USER=postal \ -e RABBITMQ_DEFAULT_PASS=postal \ -e RABBITMQ_DEFAULT_VHOST=postal \ rabbitmq:3.8
18. postal bootstrap postal.bettermetoday.us19. nano /opt/postal/config/postal.yml20. postal initialize21. postal make-user22. postal start
docker run -d \ –name postal-caddy \ –restart always \ –network host \ -v /opt/postal/config/Caddyfile:/etc/caddy/Caddyfile \ -v /opt/postal/caddy-data:/data \ caddy


