
It’s no secret that many Shopify store owners are making the switch to Klaviyo. This advanced email automation tool offers top-of-the-line features and more integrations than any other platform, making it a perfect fit for eCommerce businesses. With its extensive segmentation options, it’s no surprise that many are choosing to integrate their Shopify stores with Klaviyo.
This article is a step-by-step guide, on how to connect Klaviyo with Shopify.
Recent blog Posts
Step 1: Create A Klaviyo Account
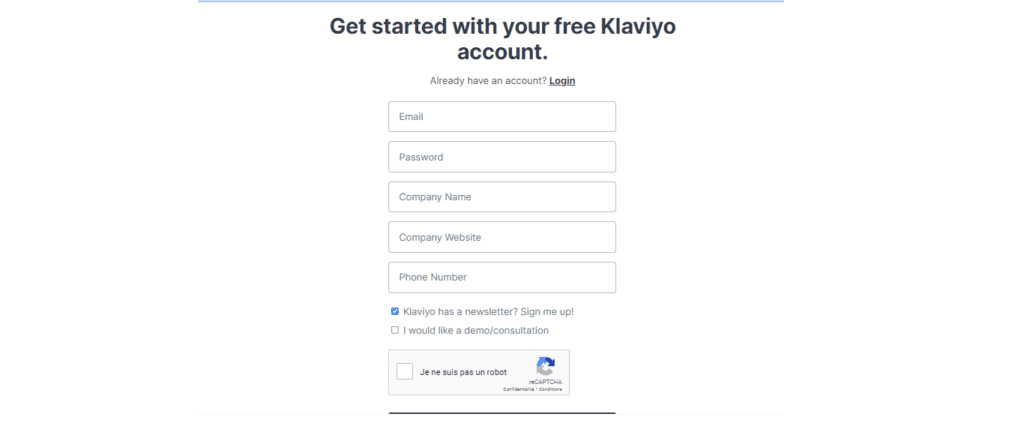
If you don’t have a Klaviyo account by now, go to Klaviyo and click “Sign Up” at the top right corner. Otherwise, click “Log In.”
For signup users, fill in the necessary information and click “Create Account”. You can now use the email and password you’ve just entered to log in to Klaviyo.
Step 2: Complete The Setup Checklist
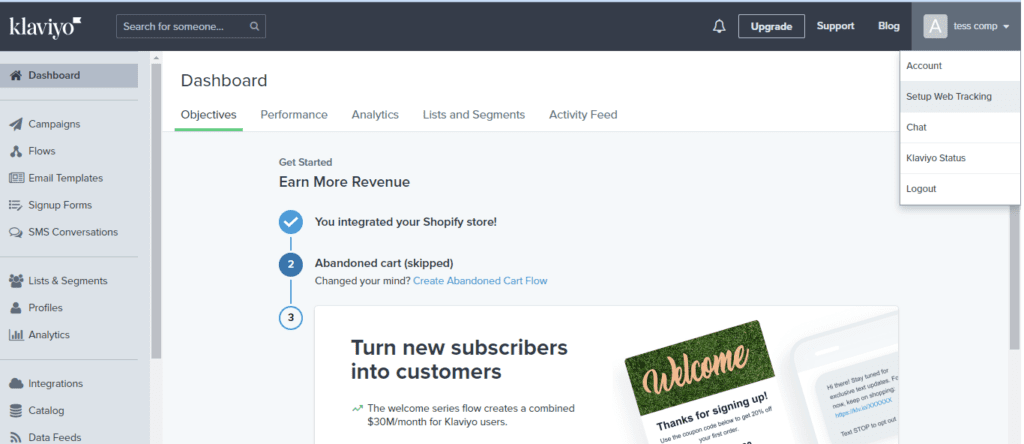
After logging in, a setup wizard will show help you integrate Klaviyo with Shopify and set up all necessary information. If you accidentally skip this step, you can always access it by clicking your account name on the top right corner.

Klaviyo setup
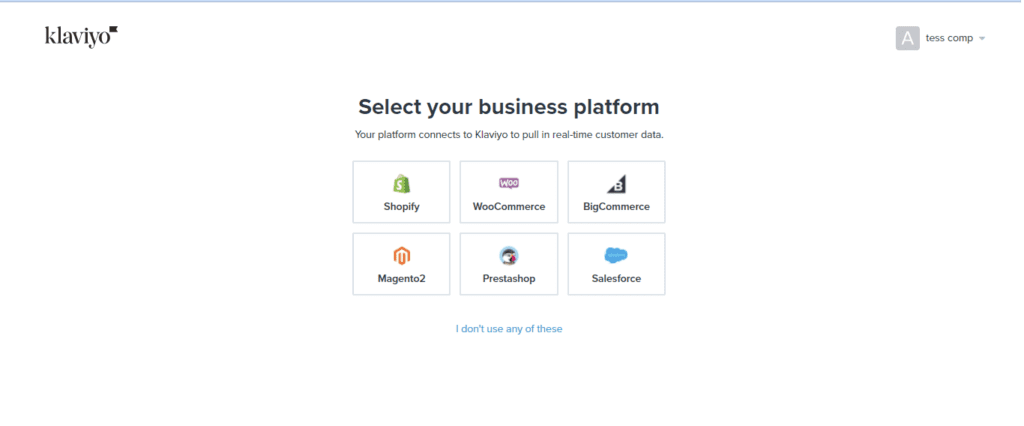
Enter the website address you want to connect with. It should be the domain name (with extension) of your Shopify store. The category is E-commerce, and the platform is Shopify.
Step 3: Klaviyo Shopify integration setup
The next step is to enter your Shopify’s URL. It is the original URL you use to sign in to your Shopify account. After entering your Shopify’s URL , click on the “Connect Shopify account” button to start the integrating process between Klaviyo and Shopify.
What’s your top business goal?
Choose the first goal you’d like to achieve with Klaviyo to get personalized recommendations for your shop’s success.
Check your email as you will need to active your account with the link sent to you.
Step 4: Tracking integration
Enabling web tracking in your Shopify store
Klaviyo has two web tracking snippets that you can use to collect valuable information about your customers:
Klaviyo Account → Click Account in the drop-down (top right, below the account name) → Select Setup Web Tracking.
- You will then be taken to a page with Klaviyo’s web Tracking-snippets
<script type="text/javascript"async=""src="https://static.klaviyo.com/onsite/js/klaviyo.js?company_id=API_KEY"></script>
- In the code snippet, be sure to replace ‘API_KEY’ with your six-digit Klaviyo Public API Key.
- If you’ve enabled Customer Accounts for your store, add an extra script to identify your customers with the email they use to log in to your store.
The full script will look like the following:
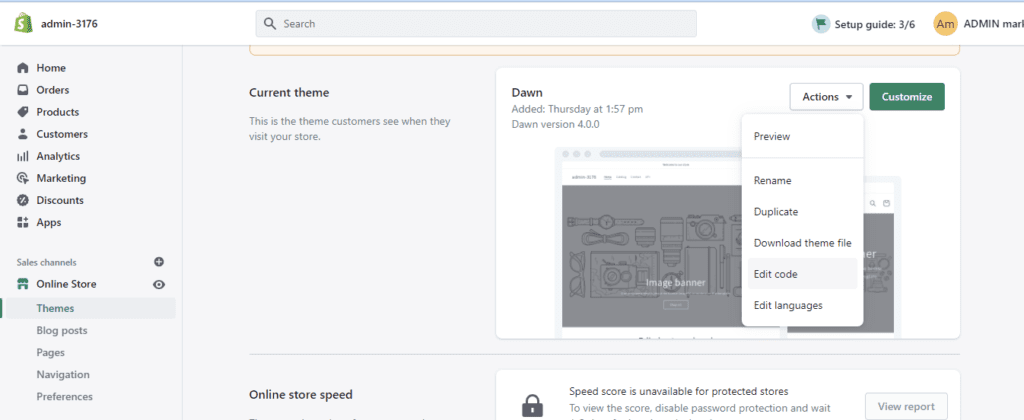
- Shopify admin → Online store → Themes → Actions in drop-down → Edit code
Search for the files you want to add the snippet to and click to open it in the editor. You can add the snippet to any page templates where you want to enable Klaviyo forms and tracking on the corresponding pages.
- Scroll to the bottom of the file and paste your snippet below the other code.
- Click save
. Go back to your Klaviyo account; to the page where you copied the code snippet. Under point 3, i.e. under the code snippet, enter the URL of your Shopify shop in the appropriate field and then click on Next.
- From your Shopify Admin click Online Store > Themes. From the dropdown click Edit Code.
Step 5: Adding and testing onsite JavaScript
Klaviyo’s onsite JavaScript, known as ‘active on site web’ tracking or Klaviyo.js, tracks when customers visit your store.
The team at Klaviyo recommends that you tick the box labelled “Automatically add Klaviyo onsite JavaScript” on your Shopify Integration settings page to activate this.
Signup forms
You can tick the ‘Collect Email Subscribers’ box to automatically add all customers who sign up to your default Shopify signup form or accept email marketing at checkout.
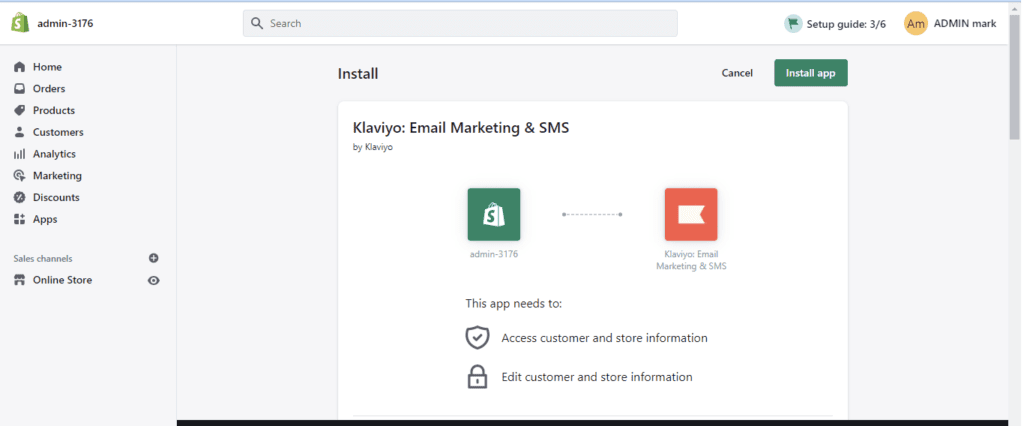
Installing the Shopify Application
Once you have installed the Shopify application by clicking on the ‘Install’ button, your Shopify account will be connected to your Klaviyo account.
- A few steps are listed on the new page. There is a code snippet under point 2. Copy this snippet.
- Now go to your Shopify account to paste the code snippet into your theme:
Shopify admin → Online store → Themes → Actions in dropdown → Edit code
- Search in the search bar for the file titled product.liquid ; this way you don’t have to search through the long list for the file. Click on the file to open it for editing.
- Now paste the code snippet that you previously copied in Klaviyo to the end of the already existing code.
For this snippet to work properly, it should be added to all product pages. If you use custom product pages, you may need to add this snippet to another theme file or to your individual custom product pages.
- Go back to your Klaviyo account; to the page where you copied the code snippet. Under point 3, i.e. under the code snippet, enter the URL of your Shopify shop in the appropriate field and then click on Next.