
How to Use MailChimp: Beginners’ Guide
Whether you want to design the best Mailchimp templates, run successful email campaigns, create a killer sales-funnel, optimize your contact lists, create automation (journey) or explore more exciting features on Mailchimp, this blog post will help teach you how to use MailChimp!
Let's get started learning how to use MailChimp!
Pssss… our team masters Mailchimp! We would love to help you out! Want to see some nice designs we made? Click HERE
Pricing
You don’t have to pay to start using Mailchimp. To get started you can sign up for the free plan. Once you have an account, click on Log in.
MaiChimp Plans
MailChimp pricing is tiers-based. The Essentials plan starts with $11 per month. The Standard plan follows with $17 per month and the Premium plan will start at $299 a month.
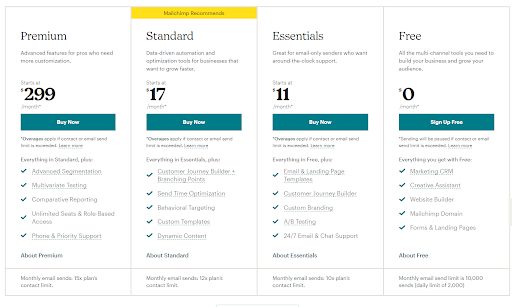
PRO TIP: If you are a small business getting started with email marketing, you can simply opt for the FREE Plan which will allow you to send 10,000 emails per month and will also allow you to store 2,000 contacts. The free plan includes helpful features such as: Landing Page builder, Website builder, and marketing CRM.
On the other hand, if you are a medium enterprise looking to grow your business and reach an exponential amount of audience, we recommend buying the Standard Tier which will allow you to create more customized and strategized campaigns, optimized email automation, and more advanced marketing tools like integrating with Facebook and Instagram ads.
Exploring Mailchimp’s Dashboard
Pssss… our team masters Mailchimp and would love to help you! Click on the chat below to get in touch!
Audience
The Audience option will show you how many subscribers you have, how many of them have unsubscribed, whose subscriber is in which tag and different tag groups.
- If you click “All contacts” you will be able to see a more detailed view of your contacts and where you can import and delete them.
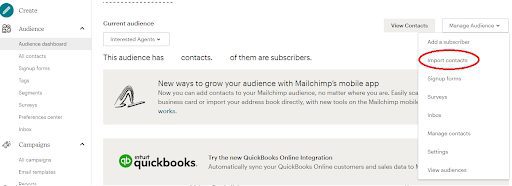
How to Setup “Audience” or contact list on MailChimp:
- On the audience dashboard, click on Manage Audience
- Then Select “Import Contacts”
3. Select your import preference and click Continue:
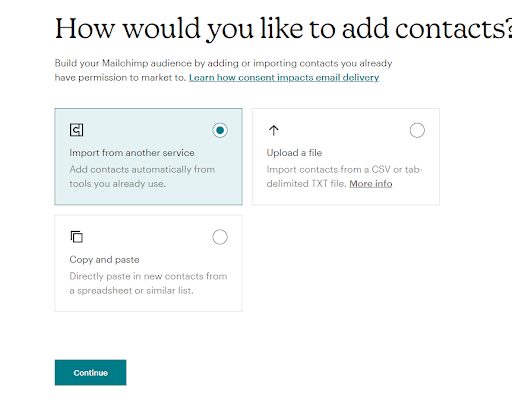
If you have a contact list in a .csv or .exe format, you can easily drag and drop or upload it or if you have an email list in a word format, you can just select “Copy & Paste”
4. After the upload is complete, click on “Continue to Organize”
5. Select an Audience you want to add the contacts to or simply make a new one.
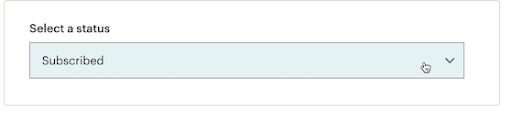
6. Select your audience status
7. If you want to update existing contacts, tick the box that says “Update existing contacts”

8. Then click “Continue to Tag” and then enter the tags you want to apply in your new imported contacts, if you don’t want to apply tags, you can skip this step by leaving it blank
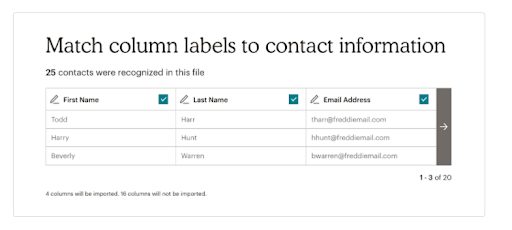
9. Click on “Continue to Match” and match the contract attributes on their corresponding fields
Pssss… our team master Mailchimp and would love to help you! Click on the chat below to get in touch!
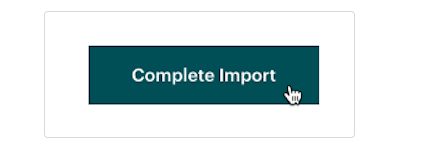
10. Click “Finalize Import” and review your import settings.
- Finally, click on “Complete Import”
Related Content:
5 Sales-Funnels that will Double Your Sales in 2022!
The Best Email Marketing Platform of 2022
The Ultimate Guide to Cleaning Up Your Email lists
Signup Forms on Mailchimp
Creating signup forms on MailChimp is one of the most common ways of collecting emails. You can embed MailChimp’s signup forms in your website or just share them on social media platforms. This menu section on MailChimp will also show you other integrations.
- Tags – you can add different labels and segment your audience based on their interest and activity. You can also send out emails with topics that relate to them, which will help you gain better opening rate and conversion rate.
Surveys
Creating a survey on MailChimp is a fun way to get to know your audience and collect data without having to use other software. You can create surveys asking them your audience about their preferences, their rating about your specific products, etc. You can easily create surveys with MailChimp and share it via email, link, Facebook or twitter.
- The Inbox menu – is an advanced section which will allow you manage responses within MailChimp.
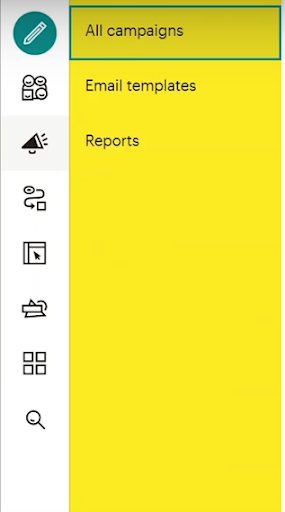
Campaigns
This section is where your email activity happens.
- All campaigns – all the emails you’re sending are shown here. You can also see a detailed view of your open rates and edit or duplicate campaigns.
- Email Templates – Consider creating a template for something you’re regularly sending on mailChimp like a monthly/weekly newsletter.
- Reports – this section will show you the analytics of your previous campaigns.
Automation
Create sales funnels and customer journey on Mailchimp. Read more below.
Pssss… our team masters Mailchimp and would love to help you! Click on the chat below to get in touch!
How to Create a Customer Journey (automation) on MailChimp
First, choose a starting point: this will trigger your automation, you can simply choose from the different options Mailchimp provides.
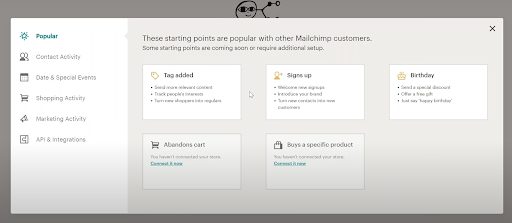
For example: Once you select your starting point as a signs up point and you want to send those who sign up, a welcome email. Your starting points will always show at the top of the automation.
PRO TIP: You can also add other starting points for automation.
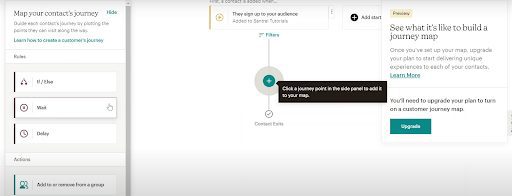
On the plus signs, you can add rules from the left menu.
In this scenario, let’s select “Send Email”:
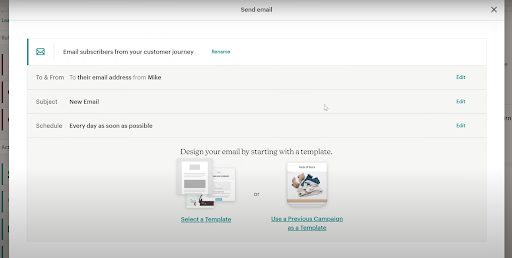
Customize the fields above and select a template for your email. We’ll show you how to create and design a template.
After creating your email, you can now add your next action/rule and continue to do so until the end of your customer journey.
Pssss… our team masters Mailchimp and would love to help you! Click on the chat below to get in touch!
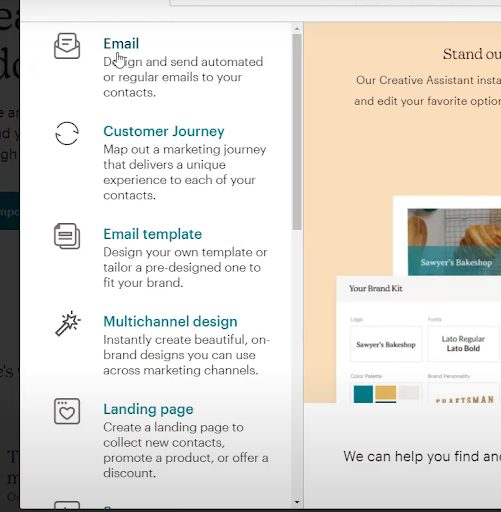
How to Create A Campaign on MailChimp
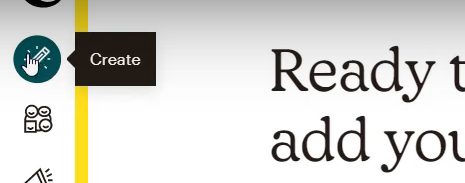
- Go to create
2. Click on email
Name your campaign and click begin. Your campaign name is an internal name that your audience won’t see
Fill out the “To, From, Subject and Preview Text” until you see a green check mark at the corresponding section.
PRO TIP: The subject for your email is a crucial part of your open rates, so think of something compelling and be straightforward, not too salesy and scammy because it might end up in the spam folder.
If you’re starting off with cold campaigns on MailChimp, make sure you read those two articles before you do so:
https://omnionlinestrategies.com/best-tactics-to-warm-up-an-ip/
https://omnionlinestrategies.com/a-complete-guide-to-cleaning-up-your-email-lists/
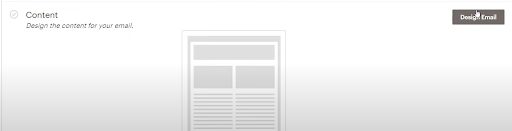
5. Now that you’re ready to design your email, click on “Design Email”
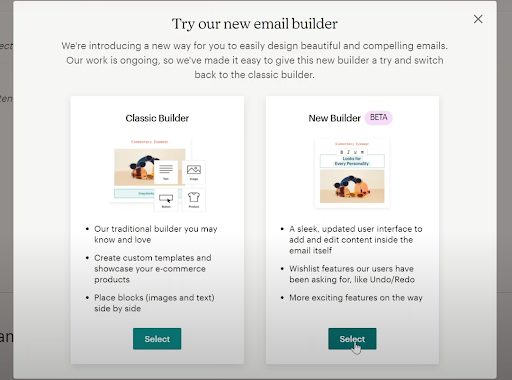
6. Choose “New Builder”
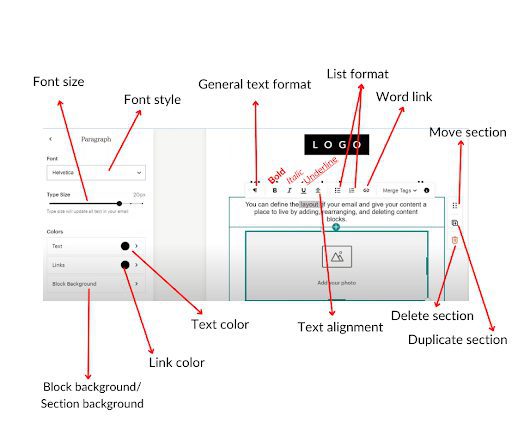
7. You will be directed to a strip layout. You can easily click on the sections and the edit menu will appear on the left side and a quick edit menu will appear at the top.
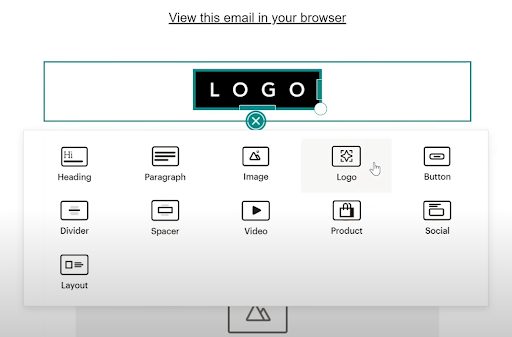
8. When you click on the “+” sign, you will be presented with different block options that you can add on your template.
9. Continue to edit/add your email contents on the template.
10. Once you’re done, click on “Continue”
11. You will now be directed again to the previous checklist. Double-check everything and finally, click “Send Email”.
Hooray hooray! Once you have sent a campaign, a detailed statistics or report will be shown in the “Reports” Section. (We’ll show you how to navigate the Reports section in a minute)
Bonus content: MailChimp Email Template Designing Tips!
Canva is Your Best friend!
Never underestimate the power of Canva! This platform can be useful in many ways, especially when you are not an expert in designing. Canva can elevate your skills and help you provide some great visuals that can instantly feel like you are an artist! Not to mention, it’s user-friendly and it provides a lot of great templates you can use.
- Start with a bang! – First impressions are important, the first part of your email will influence your audience to scroll down so START YOUR EMAIL DESIGN WITH THE MAJOR STUFF.
- Keep it simple, short and to the point.
- Insert all the links! – One of the fundamental rules of email marketing is LINK EVERYTHING – from your images to your header to your text. So wherever your audience clicks on your email, they will be directed to where you want them to go like a landing page or website.
- Emphasize your CTA – Use design elements to your buttons to make it stand out.
- Optimize the mobile version of your email – Your audience should have a user-friendly email experience on whatever device they are using.
- What are the best fonts and sizes to use on MailChimp email templates?
Rules:
1.Size 14 to 16 – paragraph font size
- Only use a maximum of 2 font styles in a template
- Use a color palette – only use colors that compliment each other.
You can browse palettes at – https://colorhunt.co/
How to Navigate through Mailchimp Reports
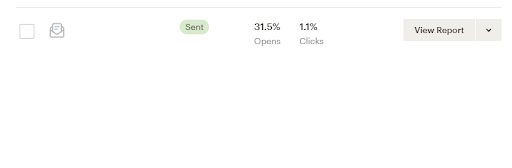
- From the main Reports page, you will see all your campaigns, whether it’s an email, landing page or Ad.
- Simply click on the “View Report” button you will see on the right side of your campaign.
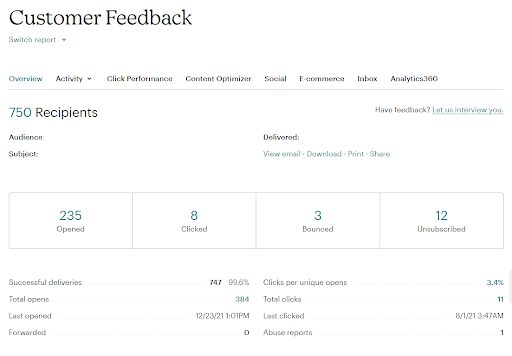
3. A detailed report will be presented to you. You can click on the colored numbers to see a more comprehensive description of the corresponding statistics.
PRO TIP: Mailchimp has upgraded their platform this 2022 to a more user-friendly version. Play around to explore exciting opportunities with Mailchimp!